Building a Natural Pool: A Sustainable Oasis
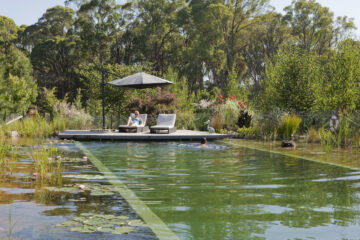
Creating a natural swimming pool involves utilizing materials like gravel, stone, clay, or even concrete for the pool structure. Instead of relying on chemicals and complex filtering systems, these pools harness the power of aquatic plants. These plants play a crucial role in the pool’s ecosystem by infusing it with oxygen, fostering the growth of beneficial bacteria that eliminate debris and potential hazards, and providing a habitat for various water-dwelling creatures such as frogs and dragonflies.
The Aesthetic and Ecological Appeal of Natural Pools
The result is a visually captivating and ecologically diverse system that is surprisingly cost-effective to construct. In fact, if you’re inclined to take on a do-it-yourself (DIY) project, you can build a natural pool for a few thousand dollars, while traditional pools can cost tens or even hundreds of thousands of dollars.
Natural swimming pools require no harmful chemicals, operate on a relatively simple basis, and once established, demand only modest maintenance. Say goodbye to the hassle of draining the pool at the end of every autumn season, as natural pools only require occasional refilling.
Crafting a Natural Swimming Pool with Care
The most economical and environmentally friendly method of constructing a swimming pool is to excavate a hole in the ground. You have the flexibility to customize the depth and dimensions to your liking, but it’s crucial to ensure that the pool’s sides slope properly to prevent soil collapse. For optimal stability, maintain a ratio of one-foot vertical drop for every three horizontal feet.
Designating Pool Zones
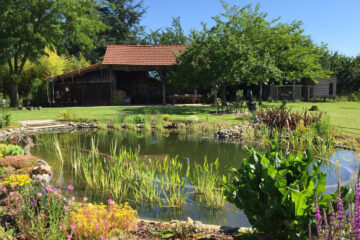
To eliminate the need for chlorine, expensive filters, and pumps, allocate at least 50 percent of your pool’s surface area to shallow plants. These plants can be concentrated in one section or arranged in a ring around the pool’s sides. It’s important to create a clear separation between the swimming area and the filtration area or plant zone. A rim positioned slightly below the water’s surface serves as a barrier, containing the plants while allowing water to flow from the swimming area into the plant zone for natural filtration. As the water passes through the fibrous root structure of the plants, bacteria attached to the roots act as a biological filter, effectively removing impurities and excess nutrients. Decomposer organisms in the plant root zones consume these bacteria, preventing the accumulation of underwater waste.
Within the plant zone, the water depth should gradually increase, reaching a maximum of 18 inches near the swimming area. The outermost 6 inches of the plant zone should be 2 to 3 inches deep, providing space for taller aquatic plants, while the deeper region accommodates submergent and floating vegetation.
In addition to ensuring water clarity and cleanliness, the shallow plant zone promotes efficient water heating and acts as a breeding ground for frogs and various invertebrates that assist in controlling mosquito populations.
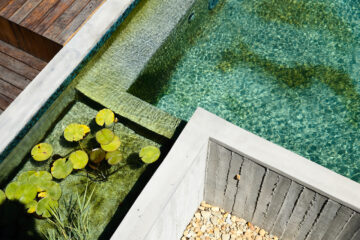
Rushes, sedges, and water lilies not only create an aesthetically pleasing border around your natural swimming pool but also contribute to the overall clarity and purity of the water.
Natural Pool Filtration Techniques
Maintaining a clean pool requires continuous water circulation and the purification abilities of plant roots. Sufficient oxygen supply is also crucial for the thriving of water organisms. Insufficient oxygen levels can result in stagnant water, which promotes the growth of unpleasant-smelling anaerobic bacteria.
- Channeling Water with PVC Tubes
To direct water from the pump to the plant zone, it is recommended to utilize PVC tubes. In colder climates, flexible PVC is preferable. Regardless of the climate, burying the tubing approximately 18 inches deep in the soil is advisable. Underwater aeration is a more energy-efficient method compared to constructed waterfalls, as it effectively circulates the water. This method involves diffusing air at the pool’s bottom.
- Constructing an Aerator
An aerator can be created using a small air compressor and durable tubing that connects to a diffuser. The diffuser releases air bubbles into the water and should be placed in the deepest part of the pool to prevent damage. A brass manifold can be connected to the compressor to regulate the air pumped into the pool. It is recommended to aerate the pool for four to eight hours daily, with a focus on the morning and evening when oxygen demand is highest. To protect the equipment from debris, you can place the aerator, pump, and skimmer in a plastic container, such as a bucket or large plant container, covered with a steel-mesh filter mat. A high-quality underwater aeration system typically costs between $1,000 and $1,200.
- Skimmers for Floating Debris
Some pool owners choose to use skimmers with an additional small pump to remove floating debris. While not essential, this can be beneficial if there are trees or shrubs nearby that shed leaves or seeds into the pool. The skimmer prevents debris from sinking and contributing to algae growth.
Precautions and Considerations
Installing pumps and compressors near or in water can be challenging and requires precautions. It is important to connect the electrical hardware to the home power supply using a buried conduit rather than relying on extension cords. To ensure the safety of the system, it is recommended to hire a skilled electrician.
Natural pools serve as habitats for various organisms such as frogs, water striders, and dragonflies, making them exciting environments for exploration, particularly for children.
Sealing Your Natural Pool
Once you have excavated the hole for your swimming pool and the plant zone, you have two options to ensure the pool retains water, depending on your soil conditions: applying bentonite clay or using a synthetic liner.
- Bentonite Clay
Bentonite clay is a cost-effective choice, with an average price of 35 cents per square foot. It acts as a binding agent, forming a bond with the soil particles and preventing water from seeping into the ground. However, bentonite clay does not bond well with sandy soil. In sandy soil conditions, a higher amount of bentonite per square foot is needed compared to clay-rich soil.
In arid climates, it is recommended to apply bentonite beneath a woven or textured plastic liner to prevent shifting. In more humid climates, bentonite can be applied directly to the soil. Thorough soil compaction is crucial before treating the pool with bentonite or any other clay powder. This can be achieved using a lawn roller or plate compactor. After compaction, spread a layer of 2 to 3 inches of bentonite powder along the pool sides and bottom, compact it using a tractor or plate compactor, and then apply another foot of high-quality topsoil and compact again.
- Synthetic Liner
If you choose a liner, it is advisable to select one made of ethylene propylene diene monomer (EPDM) instead of PVC. Although EPDM is more expensive, it offers additional benefits such as UV protection and flexibility in cold weather conditions. The liner thickness should be determined based on the soil type and conditions. For rocky or root-filled soil, a 45- or 60-millimeter liner is recommended. For sandy and smooth soil with minimal tearing risk, a 30-millimeter liner can be used. Before laying the liner, compact the sod and cover it with a layer of sand or an absorbent material such as old carpeting or newspaper for extra protection against small holes.
Preparing the Pool Bottom
After installing the bentonite clay or liner, it is important to cover the pool bottom with 4 to 5 inches of clean gravel. This gravel layer creates a habitat for beneficial bacteria that aid in the biodegradation of leaves and organic matter that may sink to the pool bottom. To ensure the cleanliness of the gravel, conduct a test by running water through it in a 5-gallon bucket with a spigot. If the water appears dirty, the gravel needs to be cleaned or replaced with a clean source. Alternatively, manufactured gravels like expanded shell aggregates are typically clean enough for use in a natural pool. Additionally, constructing cobblestone steps or a cantilevered dock over the water can provide convenient entry points and protect the pool’s sides.
Completing the Pool Perimeter
To complete the perimeter of your pool, ensure a compact and stable surface using a plate compactor. While this helps prevent soil erosion, there are alternative options available to edge the perimeter, such as rocks, flagstone, or wood planking. Another effective approach is to plant vegetation next to the edge, allowing the plants to stabilize the perimeter. Martin Mosko, a principal architect at Marpa and Associates, a landscaping company in Boulder, Colorado, suggests using plants as they not only anchor the soil but also create a natural atmosphere resembling an old-fashioned swimming hole. If you choose to use plants instead of stones, select those that thrive in wet soil or ensure that the water level remains at least one foot below the pool’s edge to prevent waterlogging of the perimeter plants.
Important Steps After Pool Construction
Once your pool is complete, it is crucial to prepare the plant zone surrounding it with 3 to 6 inches of soil. Carefully choose the soil to ensure it is free from contaminants and organic matter that may decompose underwater. Consider contacting your state’s health department or a local laboratory to have soil samples tested for potentially harmful bacteria. After arranging the soil, gravel, and necessary hardware, proceed to fill the pool. Minimize soil disturbance and allow the pool to settle for a week before planting. During this time, test the hardware to ensure it is functioning correctly.


